
Step one was to both prime and base coat each board. Because this is terrain, and not a competition miniature, I used the cheapest gray spray primer I could find at a local hime improvement store. In this case, it turned out to be a Rustoleum combination paint and primer, but anything should do.

The spray paint I used turned out to not to be a great primer for water-based paints. It seems to be a bit hydrophobic, leading water-based acrylics to bead up, rather than cover. I was able to compensate for that a bit by adding a layer of matte varnish, and by using thicker than usual paint to color in the roads. The paint you see here is a dark grey mix, composed of black and white Golden brand acrylic paints.

The next step in defining the road ways was to paint in a set of crosswalks. I wanted to get this done fast, rather than create a perfect board, so I cut a crude template out of a thick paper brochure, and used it to lay out the stripes. Once they were roughed in, I went back with a brush to clean up the edges and even things out as best I could.

Sadly, crosswalks, and a large parking lot, were about all I had done in time for CaptainCon. The board looked pretty good, but I still wanted to complete them for future use. It would be a great shame not to give them another shot on the table.

When I got back to work, the crosswalks provided boundaries for painting in the lane lines for each road. Even with a rough paint job, I wanted the center lane dividers to run close to the center of each road, and to be of reasonably even width. That meant breaking out a ruler, and some masking tape to lay out the shapes.

I then broke out some craft paint to paint in the lines. Because the roads were already painted a nearly black base color, I started with a layer of white paint, before laying on the yellow. Without that step, it would have taken many coats of yellow paint to achieve a strong color.

Masking tape has not always worked 100% properly for me in the past, but, in this case, nearly every line came up with a crisp, clean edge. Huzzah!
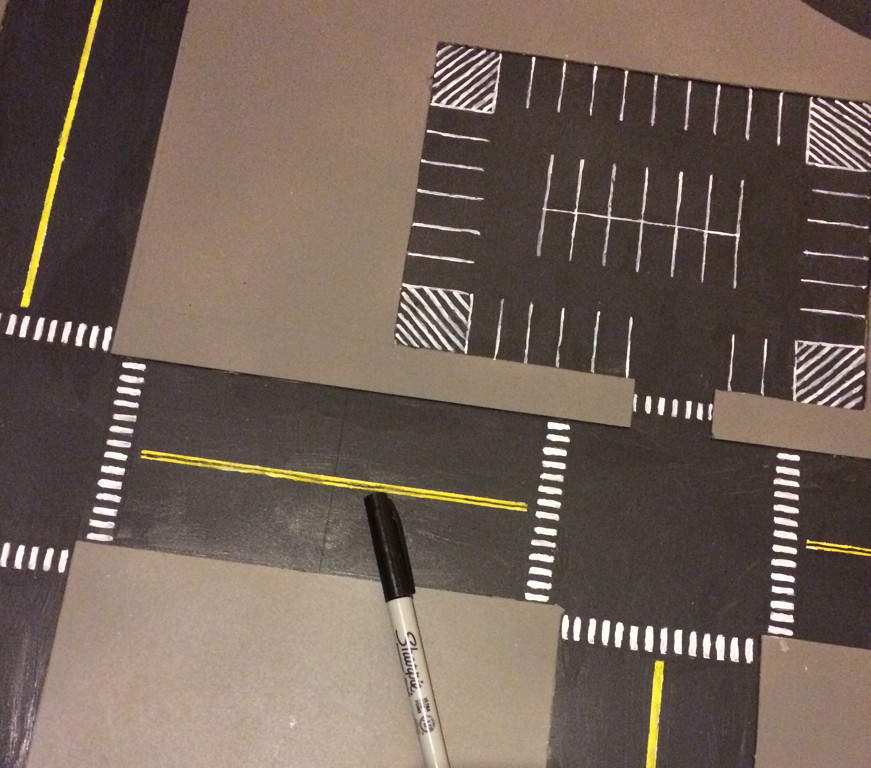
For most American 4-lane roads, the center divider is a double line, yet I painted a single thick line. The next step was to split it into two using a marker. In this case, I decided to do the whole thing free-hand. I might have gotten a more even line with a straight edge, but sharpies are imprecise, and this mechanism made it easier to adjust as I went.

The next time I build something like this, I will spend more time carefully cutting the road shapes more precisely. (Assuming I start early, and have the time) For this version, the width of the roads are not perfectly even, preventing the lanes from being of perfectly uniform size. Having painted a carefully placed center line to assure basic symmetry, I added in the final lane lines by hand. As with the Sharpie work, it enabled a lot of adjustment on the fly to blend in the sins of construction. I did use a ruler to keep the breaks in each line reasonably evenly spaced.

There is, of course, always more to be done. For example, I may paint the edge of each grey area a lighter color, to add in a curb. It might also be cool to paint and flock an area of greenery for a park. If I actually do any of that, I'll be sure to post an update!
This looks great. Great enough to comment! I've been appreciating your blog for a long while. Thank you for showing how to do roads like this.
ReplyDelete