Last time, I presented the heavily engineered mounting post that I crafted to support the metal knight & pegasus combination for this diorama. Any hope of suspending such a heavy, metal figure from a single point required a solid structure. This time, I will explore some of how I approached the dragon at the opposite end of the scene, as well as some of the initial rough terrain layout for the base.
First, and foremost, this base is going to use up a massive amount of Super Sculpey modeling clay. The material is easy to work with, cheaper than Green Stuff, and won't dry out, or set until I bake it. That means I have weeks to fiddle with it, and add detail before I run off to bake it. You can see the first few stone forms in the photo above, as well as the clear delineation between the little fired patch around the brass support post, and the fresh Sculpey.
Showing posts with label Bones. Show all posts
Wednesday, April 27, 2016
Wednesday, March 16, 2016
More ROBOTS!
As if I needed more mecha minis, my Reaper CAV Kickstarter package arrived over the weekend, bringing me another batch of delightful plastic robot toys to paint and play with.
Unlike the white plastic of the original Bones series, and of the Alpha Strike early shipment that went out last year, the latest CAV plastics are molded in a solid grey color. I'm not sure I believe it makes an important difference for painting, but it sure makes photography easier for the unpainted version - Yes, painting on grey different than painting on white, but you can always apply a primer layer to change the start point.
Monday, August 24, 2015
Confrontation Part I: Storytelling
With convention and tournament season over for 2015, I am starting to think about show-piece painting again. I have a few projects percolating at the back of my mind, but one thing I have never tackled is a diorama.
Dioramas are all about telling a story in miniature, and in a confined space. A good diorama presents exactly what is needed to convey its story to the viewer, and nothing else. For my first try, I am going to attempt a classic showdown of knight versus dragon. The two models are large, dynamic and iconic. It will be up to me to bring the piece together with base design and arrangement.
Tuesday, July 7, 2015
Sunday, April 26, 2015
CAV: Battle Damage
During a recent New England Miniature Painters Association (NEMPA) paint day, I took a short break to play around with one of the Bones CAV models that I received from Reaper Miniatures back in the Fall. The mini was part of the early-bird Kickstarter package from their CAV campaign. If everything goes to plan, the second installment of little plastic robots should appear in a few more months.
When I started this, I wasn't thinking too hard about paint. Instead, I pulled out the CAV and attacked it with my hobby knife, slicing pieces off and then playing around with a variety of materials to add on battle damage that might look cool in the finished product. One thing I'll say for Bones is that it makes this sort of experimentation easy and affordable!
Saturday, February 28, 2015
Miniatures Without Paint
This past week, I received a bounty of Kickstarter Toys in the mail. Not only did I get my classic-style demons and devils from the Fractured Dimensions Kickstarter, but Reaper's Bones II arrived, and with it, hundreds of plastic toys to play with and play.
The question of which Bones II miniature I will paint first remains a mystery, but the first miniature assembled does not:
I immediately grabbed and opened a pack of clear plastic slimes and oozes to get at the beautifule gelatinous cube within. Anybody who grew up with Dungeons and Dragons will hopefully appreciate my delight in obtaining this carnivorous, dungeon-dwelling, platonic solid.
Thursday, July 17, 2014
Elemental Forces III
In the past week, I finally completed my Bones Earth Elemental project. The way was not without obstacles, but I am pretty happy with the results, and I would dearly love to get this beastie onto the table in an RPG scenario of some kind.
I set up the design and color scheme in my previous posts. To finish the project, I focused on details. Along the way, I also continued to shade and highlight the model with increasingly pale and yellowish colors to build on the sandstone theme.
Friday, June 20, 2014
Elemental Forces II
This is an update to the Bones Earth Elemental project I began some weeks ago. Times have been busy, but I have been able to finish assembly and construction, and make a lot of progress with painting the rocky beast.
I decided to keep the "head" that came with the original Bones model, but I cut away 2/3 of the neck connecting it to the torso. Instead, my elemental's head is attached directly to the main body. The result left a bit of a gap behind the head, where the neck should have been blended into the body. I filled that with green stuff, and added some basing grit to add texture to the finished product. I do not have a completely unpainted picture, but the primed shot above should provide some idea of the process.
Wednesday, March 19, 2014
Elemental Forces
Another WIP, another large Bones model. This time, I am working on Reaper's large earth elemental, also from their Bones Kickstarter. In this case, I have been making extensive modifications to the miniature as I progress.
The original model stands on two stubby, little legs, and is pretty humanoid in shape. I like the over-all concept of the miniature, but I really dislike that kind of massively top-heavy humanoid look. If a model is going to have legs, they should look like they might work. (Although, the market very clearly shows that not everybody shares my opinion.) My idea was to replace the legs with a different foundation. My elemental will be rising up from the ground, like a tidal wave of earth and stone. With any luck, the end look will be a good one.
| Photo Copyright Reaper Miniatures, Inc. www.reapermini.com |
Wednesday, February 26, 2014
Ettin Project Completed
I finished up my Ettin project just ahead of my busy travel week for work and for TotalCon 2014, where I was able to deliver him to his proper owner. I am pleased to report that "M" seemed quite happy with his new toy.
I wound up applying a brown glaze to the Ettin's base, followed by a gloss sealer coat to polish up the stone, and make it fit better with the wood floor.
Friday, January 17, 2014
Pro Bono work
I never take paid painting commissions. I have limited free time, and even more limited painting time. I would never feel right taking somebody's money with the knowledge that their mini would get back to them "eventually". I would also have to charge a ridiculous fee, based on how I value my time. In short, nobody sane would give me the job, even if I were to accept it.
Having said that, I have painted models for free as favors or gifts. This year a friend of mine, and his son, asked me to undertake a project. Let's call them L and M, respectively. L bought a brand new Ettin miniature for M for Christmas, and they both asked me to paint the thing up as a trophy for one of M's Pathfinder characters. How could I refuse?
My raw material for the project is a Reaper Bones Ettin miniature. I asked M how he wanted the thing based, and he said it should be on a pedestal, as if on display. I started out by standing the unmodified mini on top of two bases, stacked up as base and platform. The fit wasn't perfect, but it was close, and could be made to work. It also saved me the trouble of tracking down, or fabricating, a suitable replacement.
Saturday, August 31, 2013
Think Big
As is probably clear from my past updates, the majority of my painting projects are more or less "conventional" single-figure sized miniatures. The largest things I commonly paint are usually Battlemechs, which are bigger than your average 32mm "heroic" figure, but are still not titans in the miniatures world.
With the arrival of my Bones Kickstarter I am awash in inexpensive plastic miniatures, including a variety of large monster models, perfect for terrorizing PCs in fantasy role playing games. Given the low cost of Bones (especially at the KS rates), I wanted to try my hand at painting a big model, so I buckled down to paint "Deathsleet", the Ice Dragon.
Friday, July 12, 2013
Bones-apalooza Arrives
My Reaper Kickstarter Bones have arrived!
It will take me a little while to go through them and make sure everything's in order, but for now:
Note that the small mountain of plastic in front is just from add-ons. The Vampire box is lurking in the back of the pile - that's where the real numbers are.
I had better get painting. :)
It will take me a little while to go through them and make sure everything's in order, but for now:
Woo-hoo!
Note that the small mountain of plastic in front is just from add-ons. The Vampire box is lurking in the back of the pile - that's where the real numbers are.
I had better get painting. :)
Saturday, March 23, 2013
Bones-apalooza approaches
The Reaper Bones Kickstarter is set to start shipping within the next week. I'm pretty excited to get my hands on all the plastic goodness, and Dakkadakka recently posted a photo of their giant bone dragon, Kaladrax, fromt he GAMA trade show:
Those are regular sized, 28-32mm figures in the background, cowering in fear. See the full sized image here.
All I can say is... wow.
Those are regular sized, 28-32mm figures in the background, cowering in fear. See the full sized image here.
All I can say is... wow.
Sunday, October 21, 2012
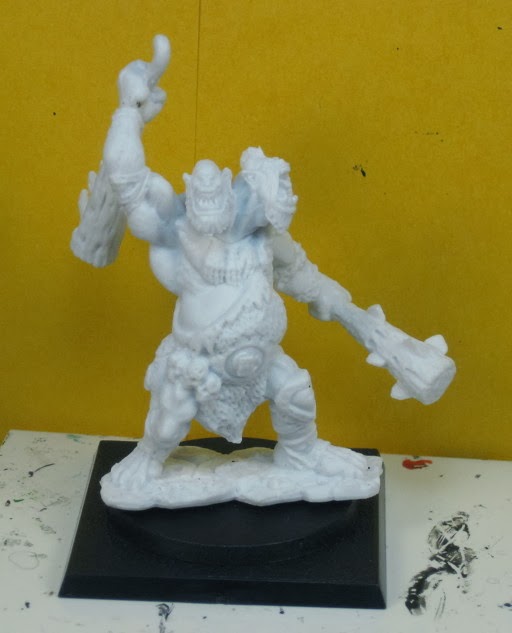
Ogre Bones WIP (Completed)
I found some time to complete my Ogre bones WIP over the weekend. I had a few issues painting his eyes, as the sculpt has some odd details and hard-to-correct, deep-set sockets, but I am pleased with my results on the whole, and I really enjoyed the group WIP concept.
Now that I have painted two of Reaper's Bones miniatures, I think I am getting a feel for the medium. There is no question that Bones models have softer detail than their metal counterparts, but it is still quite good. I would not have believed it without trying it, but I think Paint actually bonds to the Bones plastic better than it does to metal. I have been handling this Ogre for weeks without any kind of external handle attached to his base, and nothing has rubbed off the surface. I have not had to do any of the last minute touch ups that I usually do with a metal figure.
Subscribe to:
Posts (Atom)